How to find the effects tab in After Effects when it disappears
Restore Effects & Presets from the Window menu, check hidden tabs and filters, and recover missing effects while preserving the project and preferences.
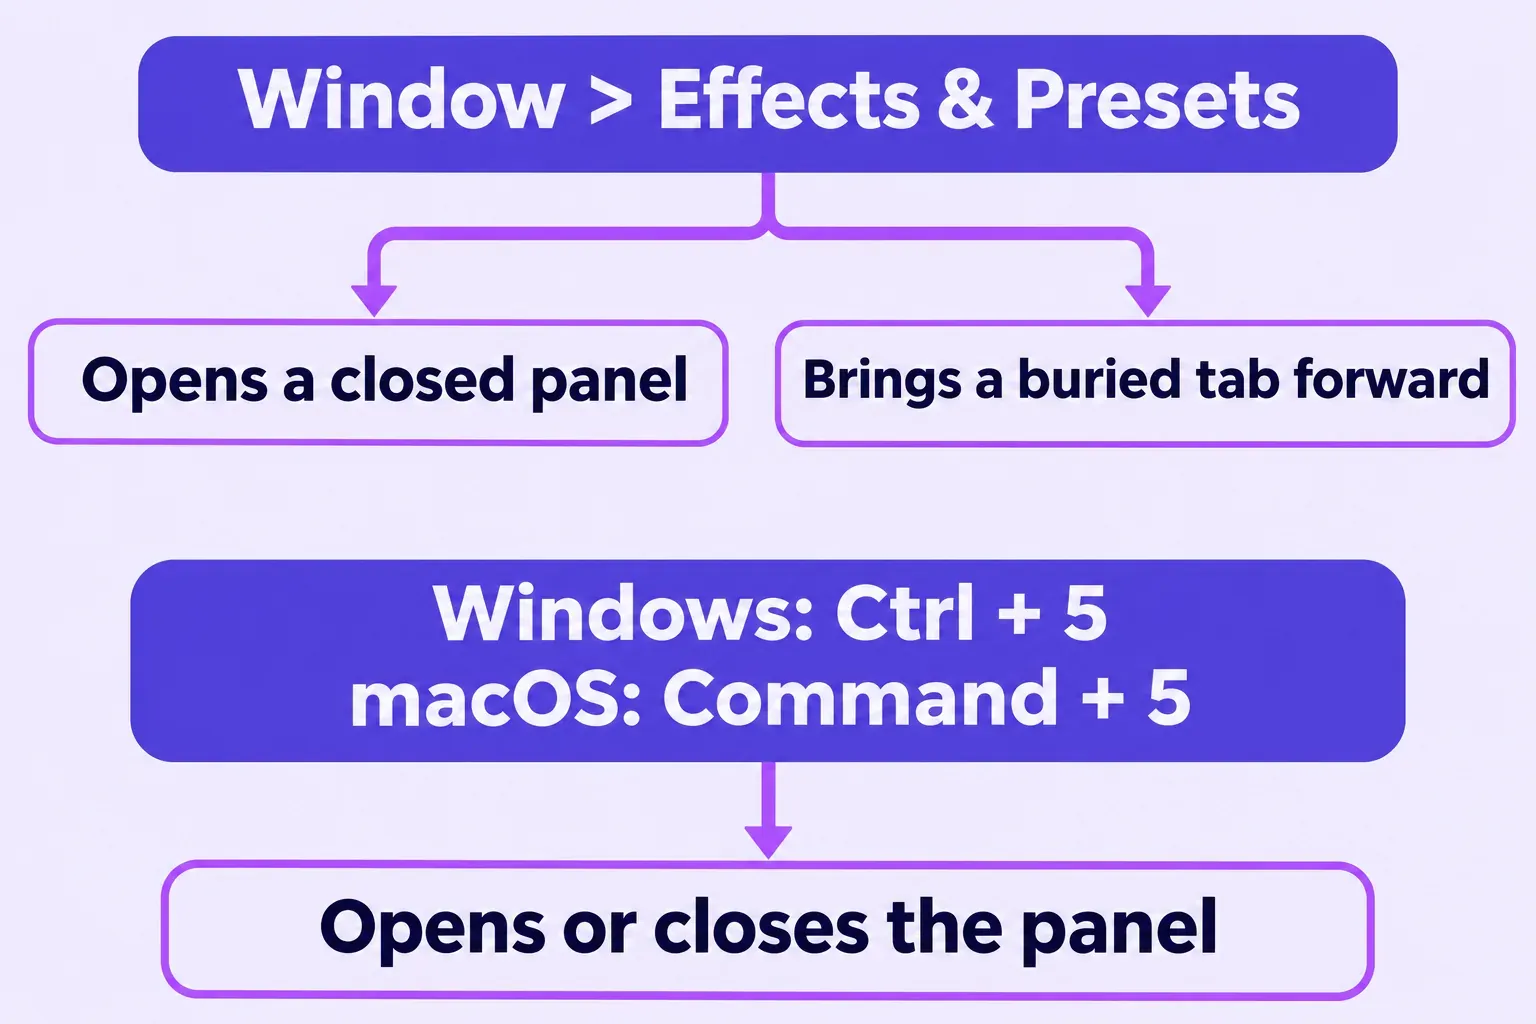
Choose Window > Effects & Presets to bring back the effects list in After Effects. The menu opens a closed panel or brings its tab to the front. Ctrl + 5 on Windows or Command + 5 on macOS toggles the panel open or closed. If the whole layout has changed, save the current arrangement as a workspace before resetting it.
For the layout fixes, keep After Effects open. To apply an effect or inspect Effect Controls, open the composition and select the layer you want to change. If you only need to apply one effect, the Effect menu works without the Effects & Presets panel.
Effects & Presets or Effect Controls: which one went missing
Effects & Presets lists the available effects and animation presets under the current search and filter settings. Its search box sits above category folders such as Blur & Sharpen, Distort and Stylize. Effect Controls shows the settings of effects already applied to a layer and opens when you apply an effect, as Adobe's effects overview describes. You can also change applied effects in the Timeline panel.
If the list and its search box are missing, start with the Window menu below. When the list is visible but an applied effect's settings are missing, jump to Effect Controls near the end of this page.
The panel disappeared in the middle of a session
Reopen it from the Window menu
The Window menu restores a closed panel and brings a buried one to the front of its group. Adobe's workspace instructions describe both cases.
- Choose Window > Effects & Presets. Expected result: the panel opens, or its tab comes forward if it was already open somewhere. Check: a search box sits at the top of the panel and category folders run down below it.
- Or press Ctrl + 5 (Windows) or Command + 5 (macOS) with After Effects in front. Adobe's keyboard shortcut reference lists this key as open or close, so if the panel was open but out of sight, the press may close it; press again and it opens. For a panel that might be sitting behind another tab, I would pick the Window menu over the key, because the menu is the route Adobe documents as bringing a panel forward.
- If the panel opens somewhere awkward, arrange it where you want it and save the layout as described in the workspace section below, so a later reset returns it there.
A panel can vanish in one keystroke if a close shortcut is pressed while it is active. Ctrl + W on Windows or Command + W on macOS closes the active viewer or panel (content first), and Ctrl + Shift + W or Command + Shift + W closes the active panel or every viewer of the active viewer's type. These are the default assignments; if the keys on this machine were changed, the Window menu still works.
It is behind another tab in the same frame
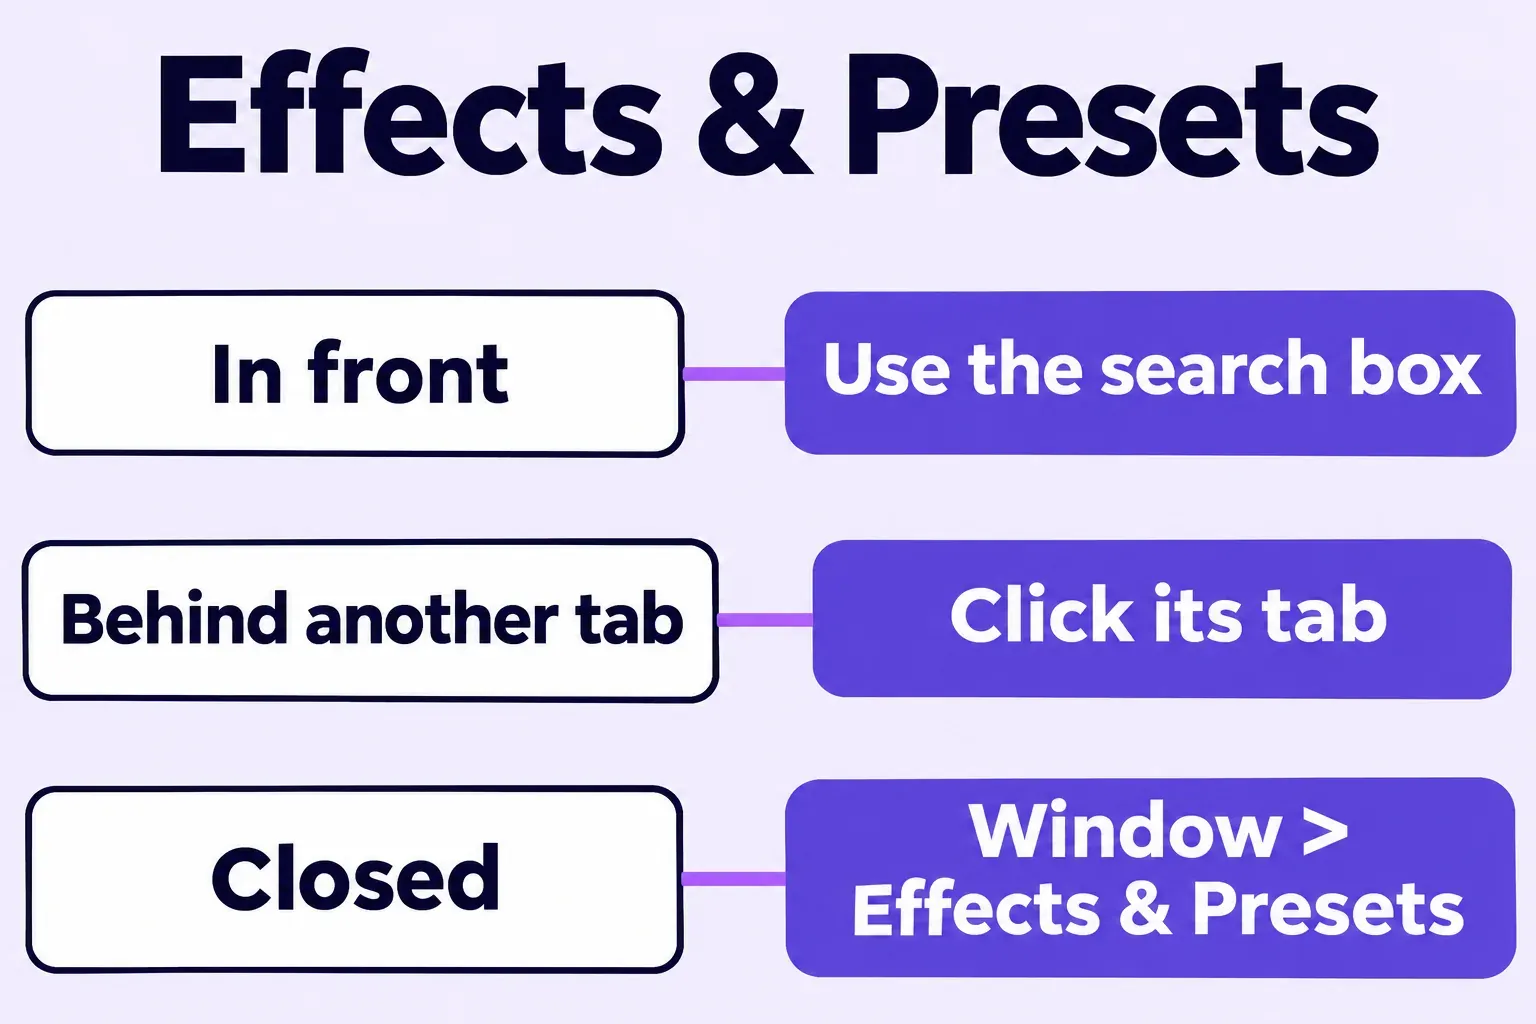
Several panels can share one frame as tabs, and only the panel whose tab is in front shows its contents. Click the Effects & Presets tab, or choose the panel from the Window menu, and it comes forward. When a frame holds more tabs than fit across it, a scroll bar appears above the tabs, and rolling the scroll wheel over the tabs switches the active panel, which is a quick way to reach a tab pushed off the edge.
A frame set up as a stacked panel group behaves differently: Adobe's page on stacked panel groups describes panels minimized to their tabs and stacked vertically, with a click on a tab expanding that panel. With Solo Panels in Stack on, expanding one panel minimizes the others, so Effects & Presets can look closed when it is only folded. Ctrl-click on Windows or Command-click on macOS on a tab expands or minimizes every panel in the group, and both settings sit under Panel Group Settings in the panel menu.
Another panel fills the whole window
If one panel group fills the window, point at it and press the accent grave key, `, which on a US keyboard is the unshifted key under the tilde. You can also double-click the active panel's tab to restore the group. Expected result: the other groups, Effects & Presets among them, return around it. The same key or double-click maximizes a panel again, so a stray tap is enough to cause this.
It moved into a floating window
A panel dragged out with Ctrl or Command held, or sent out with Undock Panel, lives in its own floating window, which can end up behind the application or on a second display. Ctrl + Alt + \ on Windows or Command + Option + \ on macOS moves the active application window or floating window to the main monitor and resizes it to fit. If the floating window was closed rather than lost, the panels inside it closed with it, so reopen Effects & Presets from the Window menu.
The layout changed after a workspace switch or a project opened
Save the current layout, then reset the workspace
Reset replaces panel moves made since the workspace was saved. If the current arrangement is worth keeping, save it under a new workspace name first.
- Choose Window > Workspace > New Workspace and give the current arrangement a name. Expected result: the layout is stored under that name and can be chosen again from Window > Workspace.
- Switch to the workspace you want to repair, then choose Window > Workspace > Reset followed by that workspace's name. Expected result: panels jump back to the layout saved for it.
- Check for the Effects & Presets tab. A reset brings the panel back only if that saved layout contained it. If it is still missing, open it from the Window menu, place it where you want it, and save with New Workspace again.
I'd keep a workspace with Effects & Presets where you want it: resetting that workspace then restores your saved arrangement.
Switch to a different workspace
Workspaces are chosen from Window > Workspace or from the workspace bar on the right side of the Tools panel; names that do not fit on the bar sit in the chevron menu at its end. Shift + F10, Shift + F11 and Shift + F12 switch workspaces only once a shortcut has been assigned with Window > Assign Shortcut To [Workspace Name] Workspace, so pressing them on a fresh install may do nothing. On a Mac, Adobe notes that F9 to F12 may collide with system shortcuts; hold Fn or Globe with the key, or use the function-key setting covered in the Effect Controls section below.
A project arrived with its own layout
A project saved with a custom workspace carries that choice with it. On another system, After Effects looks for a workspace with a matching name and otherwise falls back to the current local one, so a colleague's project can rearrange your screen on opening. To keep your own layout whenever a project opens, turn on Maintain current workspace when opening projects in Edit > Preferences > Project on Windows or After Effects > Settings > Project on macOS. Check: open the project again and the panels stay where they were.
The Learn workspace is active
Help > Learn After Effects switches to the Learn workspace, which Adobe's workspaces page lists with the Learn, Project, Composition and Timeline panels. Effects & Presets is not on that list. Switch to another workspace from the workspace bar or Window > Workspace, or open the panel from the Window menu.
After Effects was started in Safe Mode
Since version 26.3, Adobe's fixed-issues list notes, custom workspaces are neither loaded nor saved in Safe Mode, and since 25.6 scripts, ScriptUI panels and CEP extensions do not load there either. A Safe Mode session therefore shows a layout without your custom arrangement, and changes made to it are not kept. Quit and start After Effects normally before rearranging anything.
Apply an effect without the panel
Every route here works on what is selected, so select one or more layers in the Timeline or Composition panel first. With nothing selected there is nothing to receive the effect.
- Choose the effect from the Effect menu by category, for example Effect > Stylize > Glow, which is the route Adobe's After Effects workflow overview uses. Expected result: Effect Controls opens with Glow listed. Check: press E in the Timeline panel and only the Effects group of the selected layers is revealed, with Glow inside it.
- In 26.2 and later, open Quick Apply with Edit > Quick Apply, Ctrl + Enter on Windows or Cmd + Return on macOS, or the lightning bolt icon in the Timeline panel. Type e: before the name to search effects only, then press Enter or double-click the result. Adobe's Quick Apply page also lists the modifier keys that put the result on a new solid or a new adjustment layer instead of the selection.
- Ctrl + Shift + E on Windows or Command + Shift + E on macOS is the default for Effect > Remove All, which deletes every effect and its keyframes from the selected layers. Edit > Undo brings them back, so if a stack vanishes, undo straight away.
- To repeat the most recent effect on other layers, select them and press Ctrl + Alt + Shift + E on Windows or Command + Option + Shift + E on macOS. The same chord with F instead of E applies the most recent animation preset.
Back in the panel, dragging an effect onto a layer in the Timeline, Composition or Effect Controls panel applies it, and so does double-clicking it with layers selected. Double-clicking an effect with no layer selected does nothing, which is easy to mistake for a broken panel; a preset double-clicked with no layer selected creates a new layer instead.
The panel is open, but the list is empty or short
Clear or refine the search
A word left in the search box hides everything that does not match it. Click in the panel to make it active, then press Ctrl + F on Windows or Command + F on macOS, or choose File > Find, and the cursor lands in its search field. Delete the text and the full list returns, with expanded folders collapsed again. Two rules from Adobe's notes on search fields explain most failed searches: a space is a literal character, so Change Color finds Change Color but not Change To Color, and a comma means or. Searching a single distinctive word, such as Glow, is the safer habit.
Check the panel menu filters
The panel menu button sits in the upper-right corner of the panel, and its options decide what the list includes:
- Show Effects and Show Animation Presets switch the two kinds of item on and off; with Show Effects off, no effect appears at all.
- Without Show Effects for All Color Depths, the list holds only effects that work at the project's colour depth, so a 16 or 32 bpc project can look short of effects that exist. An 8 bpc effect used in such a project gets a warning beside its name in Effect Controls.
- Show GPU Capable Effects Only shows only the effects your GPU can speed up, so what it hides depends on the graphics card in this computer. On versions before 25.2 this filter could also hide the Presets folder, a bug Adobe lists as fixed in 25.2.
- The organisation options change the shape of the list: Categories gives folders such as Distort and Stylize, Explorer Folders (Windows) or Finder Folders (macOS) groups items by the folders they are installed in, and Alphabetical gives one flat run. If the category folders you expect are not there, switch back to Categories.
Older effects sit in the Obsolete category
Some effects from earlier versions were moved rather than removed. Adobe's list of obsolete effects keeps them in an Obsolete category for compatibility with old projects, Basic 3D among them, and advises other effects and techniques for new work. An older tutorial that sends you to a category where the effect no longer appears may simply predate that move.
One effect is gone after a crash or a plug-in install
Re-enable it in the Effect Manager
Save the project before changing the Effect Manager; changes take effect after a restart. Following a crash, After Effects can identify an effect that may have caused it and offer to disable it. A disabled effect disappears from both the Effect menu and Effects & Presets, as Adobe's Effect Manager instructions explain.
- Choose Effect > Manage Effects, or Manage Effects in the Effects & Presets panel menu.
- Find the effect and read its Enabled and Last Crashed columns. A cleared Enabled box with a recent crash entry is the one that went missing.
- Turn Enabled back on and restart After Effects. Check: the effect is listed again in the panel and under its Effect menu category.
If the crash returns after you re-enable the effect, leave it disabled while investigating the failure. The repeated crash is a reason to check that effect's version and compatibility; it does not establish the cause by itself. Keep the original project intact during those checks.
A third-party effect does not show up
Effects are plug-ins, and After Effects reads the Plug-ins folder and its subfolders only when it starts. Adobe's overview places it under Program Files\Adobe\Adobe After Effects\Support Files on Windows and in the Adobe After Effects folder in Applications on macOS, and it skips any folder whose name begins and ends with parentheses. Refresh List in the panel menu is meant for animation presets. A newly installed effect needs a restart, so save the project first, then quit and start After Effects again. Reveal In Explorer on Windows or Reveal In Finder on macOS, in the same panel menu, opens the folder holding a selected effect, which shows where a working third-party effect from the same vendor sits.
Rule out Safe Mode before reinstalling anything. Start in Safe Mode, in Edit > Preferences > Startup & Repair on Windows or After Effects > Settings > Startup & Repair on macOS, restarts After Effects with third-party plug-ins and extensions disabled for that session, so their effects stay out of the list until a normal start. If this session began in Safe Mode, that explains the missing effect: save the project, quit, and start After Effects normally.
Adobe's current effect list includes Keylight (1.2) under Keying, Mocha AE and Mocha shape, CC effects, and EXtractoR and IDentifier under 3D Channel; if one of those is missing, look in the Effect Manager before downloading anything. Use the plug-in maker's installer and check its compatibility requirements before adding an effect.
Effects show as Missing when a project opens
When a project uses an effect whose plug-in is not loaded, After Effects shows a warning dialog on opening, and the effect's instances carry Missing: before their names in the Timeline and Effect Controls panels. Press F twice (FF) with the composition active to reveal every missing effect in it. The usual causes are a plug-in not installed on this computer, an effect disabled in the Effect Manager, or a move between platforms: Adobe's planning and setup notes say native effects keep working between Windows and macOS, while some third-party effects may not work even with the plug-in installed on the second system and may need reapplying.
Save a copy of the project under a new name before changing its effect stack. First restore the required plug-in: install or re-enable the compatible version, restart After Effects and reopen the copy. Check whether the Missing: prefix has gone and FF reveals no missing effects. If the warning remains, confirm the exact plug-in and version with its maker before replacing anything. Adobe's suggestion to reapply an effect concerns some third-party effects after a move between operating systems. In that case, keep the original instance and its settings available while rebuilding the effect in the copy.
Effect Controls is empty or will not open
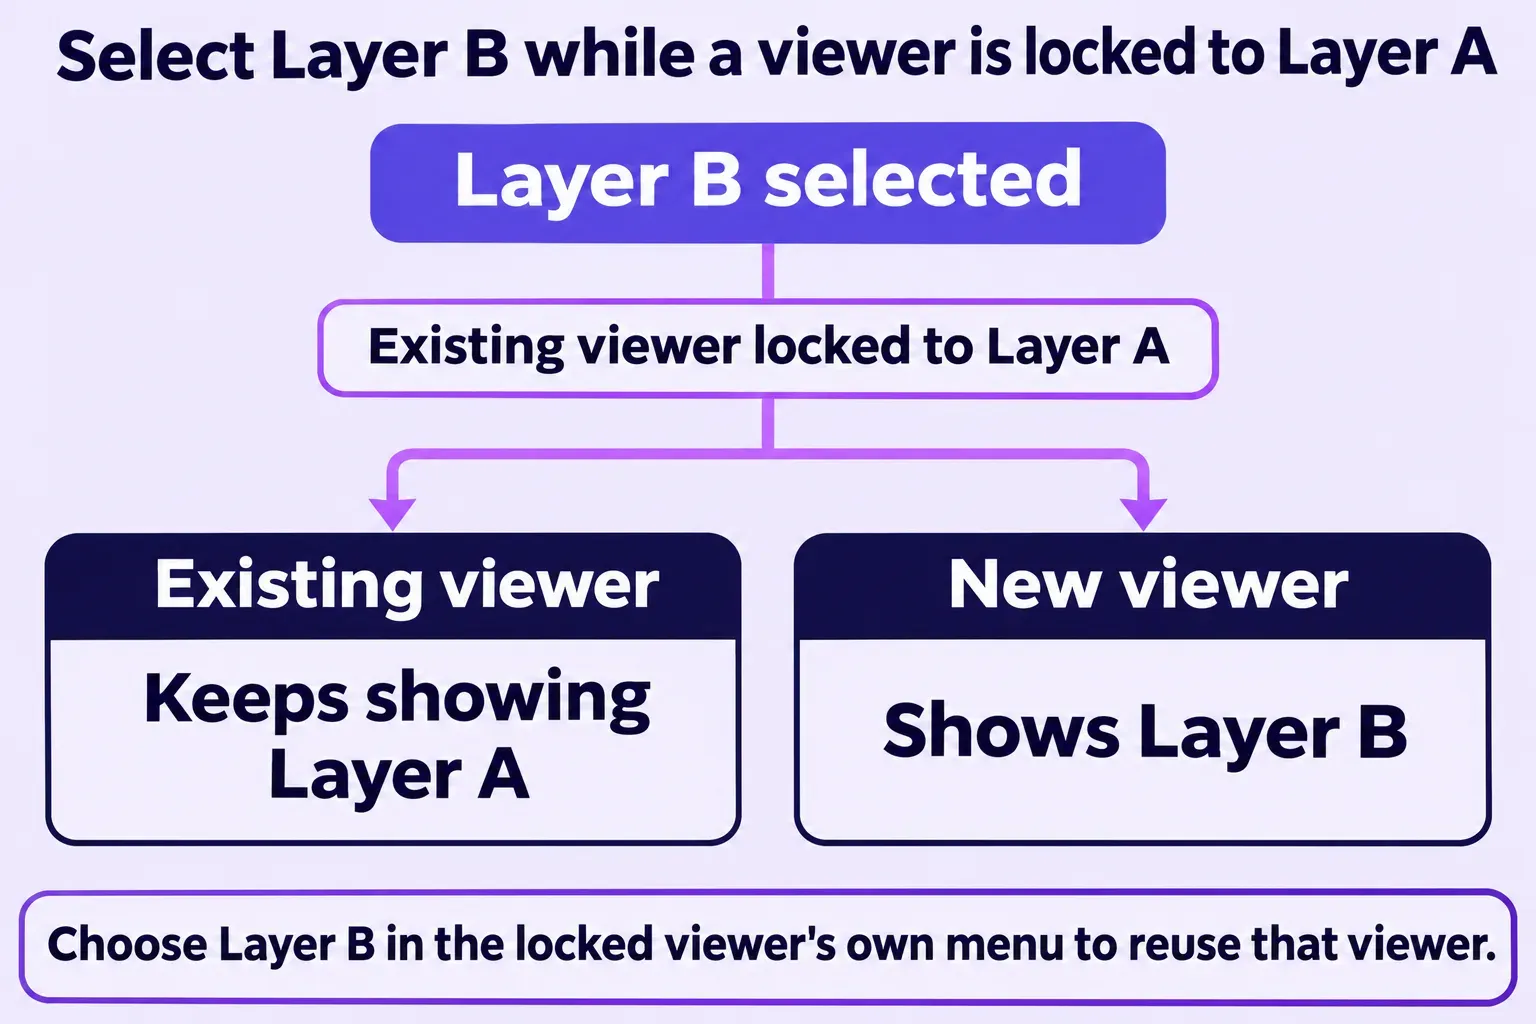
Effect Controls is a viewer tied to a layer. Several viewers can be open for different layers, and the viewer menu in the panel tab chooses which layer it shows. If the controls stay on another layer after you select a new one, choose the intended layer from that menu. To let the viewer follow a new selection, clear Locked in the viewer menu or use Toggle Viewer Lock. Adobe's viewer controls explain how locking preserves the currently displayed item.
- Select the layer in the Timeline panel and press F3. Adobe's shortcut reference lists F3 as opening or closing Effect Controls for the selected layer on both Windows and macOS, so a press with the panel already open hides it; press again.
- On a Mac, F3 runs Mission Control by default. Hold Fn or Globe while pressing F3, or turn on Use F1, F2, etc. keys as standard function keys in System Settings > Keyboard > Keyboard Shortcuts > Function Keys, as Apple's article on the Mac's top-row keys describes.
- If Effect Controls opens but is empty, check the layer itself: press E with it selected in the Timeline panel. No Effects group means the layer has no effects, and the panel is behaving correctly.
In 26.5 the panel also looks different from older tutorials. Adobe's notes on what is new in 26.5 describe an updated Effect Controls panel with icon-based controls and colour labels for individual effect instances; the overview adds that visibility is now an eyeball icon, Reset is a Reset Effect icon, and informational icons sit together on the right with tooltips. Controls that look unlike an older tutorial's are the redesign, not a fault.
Last resort: reset preferences
Reset All Preferences To Defaults resets preferences, workspaces and the debug database and requires a restart. Keep it for a layout problem that survives the panel and workspace checks. Start in Safe Mode is a temporary diagnostic option when a plug-in or preference setting is suspect.
Save the project and back up your preferences before resetting. In Edit > Preferences > Startup & Repair on Windows or After Effects > Settings > Startup & Repair on macOS, use Reveal Preferences in Explorer or Reveal Preferences in Finder. Quit After Effects and copy that preferences folder to a safe location. Adobe's preferences instructions identify these buttons and the folder used for a manual backup; avoid editing the original files.
Reopen After Effects, return to Startup & Repair and choose Reset All Preferences To Defaults. Adobe also documents a startup reset: hold Ctrl + Alt + Shift on Windows or Command + Option + Shift on macOS while the application launches. After the restart, choose Window > Effects & Presets and check that the search box and category list are visible.